

Fix a Stuck Grinder Screen in 15 Minutes Without Cracking the Housing
Yes. Most removable herb-grinder screens can be swapped out with basic tools and a few minutes of patience. Some grinders use fixed screens that require manufacturer parts or a full unit replacement instead. If the screen is just clogged, clean it first. If it’s torn, warped, or bent, skip straight to a new one. Before you order anything, check your model number or measure the screen’s diameter and note how it’s held in place.
TL;DR:
- Most removable grinder screens can be replaced quickly with basic tools, but fixed or welded screens require manufacturer parts or full grinder replacement.
- Signs indicating a need for replacement include visible damage, drops in grind quality, unusual resistance when spinning, and frequent clogging even after cleaning.
- Using a plastic pry tool and soaking in warm soapy water or alcohol are recommended methods for removing stuck screens without damaging the housing.
- Stainless steel screens with 60 to 100 mesh are durable but may require more frequent cleaning, especially in humid environments; polymer screens are lighter but degrade faster.
- Always measure or verify compatibility with your model, and focus on soaking and gentle prying before forcing removal to avoid cracking or damaging components.
Table of Contents
- Signs Your Grinder Screen Needs Replacing
- What You Need to Replace or Buy a Grinder Screen
- How Do You Replace a Grinder Screen Step by Step?
- Cleaning and Maintenance to Stop Screens From Getting Stuck
- How Do I Choose the Right Mesh and Material?
- Troubleshooting: When a New Screen Won’t Fix the Problem
- Tree Lock Box’s Take on Grinder Screen Replacement
- Where to Find Replacement Screens and Grinder Parts
- Sources
- FAQ
Signs Your Grinder Screen Needs Replacing
A screen rarely fails without warning. It usually tells you in one of four ways.
- Visible damage. Tears, pinholes, or warped mesh mean the screen can’t do its job anymore, no matter how well you clean it.
- Grind quality drops. You start noticing bigger chunks, uneven texture, or more plant material sneaking past into the kief chamber.
- Mechanical resistance. The grinder feels harder to turn, rattles, or vibrates oddly when spinning, often a sign the screen has shifted or deformed.
- Clogging keeps coming back. If you just cleaned it and it’s stuck again within a day or two, the mesh itself may be too damaged to hold shape.
Maintenance blogs covering industrial and consumer equipment alike point to the same four red flags. When you see two or more at once, replacement is almost always faster and cheaper than fighting the old screen.
What You Need to Replace or Buy a Grinder Screen
Before you touch a screwdriver, figure out how your screen is actually secured. Most fall into one of three categories: tiny screws, plastic clips, or a simple friction fit that pops in and out.
Tools worth having on hand:
- A precision driver set (small Phillips or flathead bits)
- A plastic pry tool or old gift card (never metal)
- A soft-bristle brush and a parts tray
- Isopropyl alcohol wipes and warm water with dish soap
When shopping for a replacement, match four things: diameter, mesh count or micron rating, material (stainless steel holds up better than polymer for daily use), and confirmed compatibility with your model. Consumer screen listings, like those for small coffee and herb grinders, are typically sold as model-specific parts rather than universal fits, so guessing on size usually means a return shipment.
You can source parts through the manufacturer’s page, general accessory retailers, or Tree Lock Box’s own grinder product pages, which list compatible screens alongside the grinders themselves.
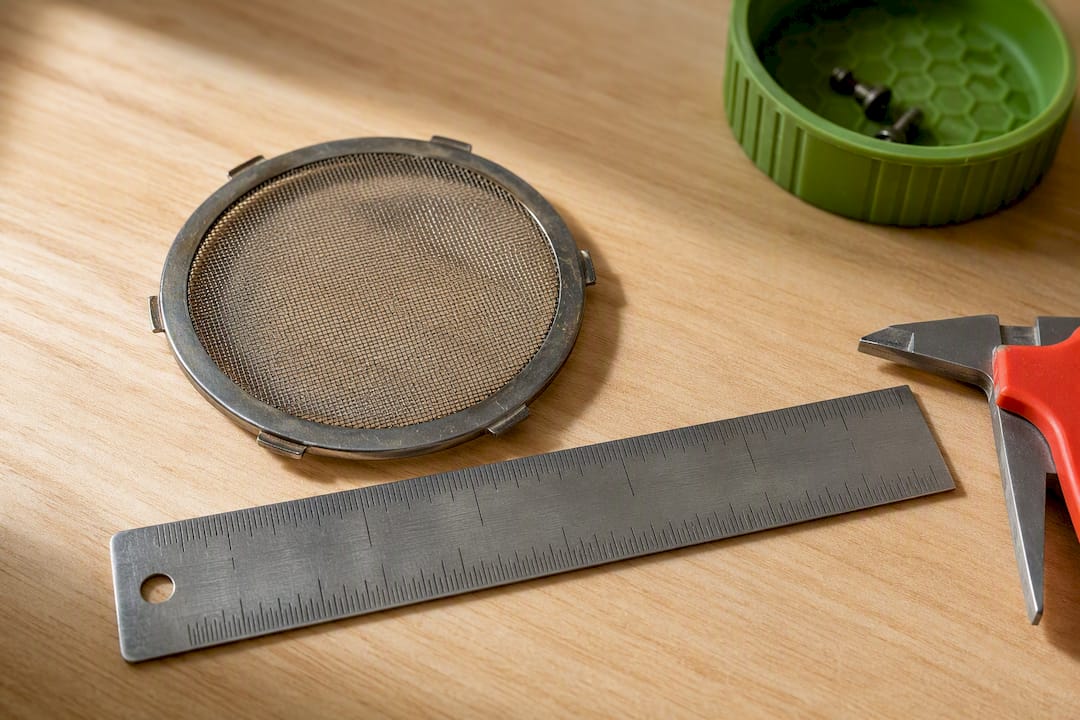
Pro Tip: Snap a photo of the old screen next to a ruler before you toss it. It saves you a second trip to remeasure when the replacement doesn’t fit.
How Do You Replace a Grinder Screen Step by Step?
Work over a flat, well-lit surface with a parts tray nearby to catch small screws or clips. If your unit is electric, unplug it before starting.
- Empty the grinder completely. Tap it gently over a soft container to save any kief clinging to the screen, since this also shows you how stuck the screen actually is.
- Remove fasteners or clips. Unscrew visible hardware, or gently disengage plastic clips with your fingers or a pry tool.
- Free a friction-fit screen. Insert a plastic pick at the edge and work it around the circumference in small increments. Never lever hard from one spot; that’s how clips crack.
- Pre-soften heavy buildup. If resin has glued the screen in place, soak the grinder top in warm soapy water for 10 to 15 minutes, then brush gently before trying removal again. Hobbyist guides consistently recommend soaking over force, since forcing a stuck screen is the top cause of cracked housings.
- Seat the new screen. Align it flat against the mating surface, then reattach clips or screws by hand until snug. Don’t overtighten. Manufacturer manuals covering larger grinding equipment stress the same principle at scale: a screen that isn’t seated evenly wears out fast and grinds inconsistently.
- Test with a small sample. Run a pinch of dry herb through before committing to a full load. If it feels loose or grinds oddly, recheck the fit; a screen that isn’t fully seated will rattle or slip during use.
Pro Tip: If you removed screws, drop them into a labeled dish by size as you go. Mismatched screws are a common reason screens sit crooked after reassembly.
Cleaning and Maintenance to Stop Screens From Getting Stuck
Fine kief particles act almost like glue once they build up, binding the screen to its housing until removal becomes a fight. Regular cleaning heads that off entirely.
- Dry brush weekly to knock loose material free before it compacts.
- Freeze and tap for stubborn resin: a couple of hours in the freezer makes buildup brittle enough to fall away with a gentle tap.
- Warm soapy soak every few weeks handles general grime without stressing plastic components.
- Isopropyl alcohol cuts through sticky resin fast, but stick to metal parts. It can degrade some polymer screens over time.
Dry every piece fully before reassembly. Trapped moisture invites mold, and a damp screen re-clogs almost immediately. Skip metal scrapers or abrasive pads; they scratch mesh and speed up the exact wear you’re trying to prevent. Treelockbox’s own cleaning and maintenance guide walks through frequency by usage level, from occasional users to daily ones.
Pro Tip: Light users can get away with a monthly deep clean. Daily users should aim for weekly, since resin builds up fast enough to noticeably slow grinding within a couple of weeks.
How Do I Choose the Right Mesh and Material?
Mesh count decides how much kief you capture and how easily the screen clogs. A finer mesh, often in the 60 to 100 range on consumer grinders, catches more trichomes but traps more plant matter too, which means more frequent cleaning.
- Stainless steel holds shape under repeated use and tolerates alcohol cleaning without degrading, making it the sturdier long-term pick.
- Polymer or monofilament screens are lighter and often cheaper, but they lose rigidity faster under heat or aggressive solvents.
- Sizing comes down to two numbers: the screen’s diameter (commonly 1.5 to 2.5 inches on consumer grinders) and the retaining pattern, whether that’s screws, clips, or a snap fit.
Match mesh to your end goal. If you’re rolling joints, a coarser mesh that lets more material through works fine. If you’re chasing kief for a smoother grind, finer mesh pays off despite the extra cleaning. Humid climates also tend to gum up fine mesh faster, so if you live somewhere sticky, a slightly coarser screen may save you maintenance time.
Troubleshooting: When a New Screen Won’t Fix the Problem
A stuck screen isn’t always a simple swap. Sort out what’s actually broken before you order parts.
- Resin-stuck screens: soak first, then work a plastic pry tool gently around the edge. Metal tools crack clips fast, which turns a five-minute fix into a broken grinder.
- Cracked housing or clips: a new screen won’t help if the mating surface it seats against is damaged. At that point you’re often better off replacing the whole grinder unit.
- Bent or warped screens: always replace rather than try to flatten. Warped mesh usually means the surface it was seated against took some damage too, so check that surface before installing the new screen.
- Still stuck after soaking and gentle prying: stop forcing it. Contact the manufacturer for model-specific guidance, or accept that a new grinder is cheaper than a cracked one you keep fighting.
Tree Lock Box’s Take on Grinder Screen Replacement
Stainless steel mesh consistently outlasts polymer screens in day-to-day use. It handles alcohol cleaning without warping, which matters more than most buyers expect when they first compare materials side by side. The most common mistake we see isn’t a bad screen. It’s forcing removal with a metal tool instead of soaking first, which is how a $10 fix turns into a cracked housing. Our maintenance guide and grinder product pages walk through the same soak-first approach covered above, built around the parts and materials we actually sell.
— Tree Lock Box
Where to Find Replacement Screens and Grinder Parts
Replacement-ready grinders and cleaning tools built for the soak-and-swap approach are available to help avoid matching mismatched parts from different sellers. Before ordering, confirm your model’s diameter and retaining pattern against the product listing, and check the cannabis tools FAQ if you’re unsure whether a screen or a full grinder makes more sense for your situation. If your current unit is beyond saving, browse the full shop for grinders, prep tools, and cleaning kits built to make the next replacement a lot less painful.
Sources
For model-specific diagrams and safety notes, Schutte Hammermill’s wear-parts guide and the Prater fine grinder manual cover stepwise removal and reassembly at an industrial scale, with safety principles that still apply to hobby-size units.
- A How-To Guide for Replacing Your Wear Parts: Replacing the Screens or Grates | Schutte Hammermill
- How To Remove Screen From Grinder – A Comprehensive Guide For Cleaner
FAQ
Can Every Grinder Screen Be Replaced?
Most removable screens can be swapped, but some grinders use fixed or welded screens that require manufacturer parts or a full unit swap instead.
How Do I Know My Grinder’s Screen Size?
Measure the screen’s diameter directly or check your model number against the manufacturer’s parts page, since replacement screens are typically model-specific rather than universal.
What’s the Safest Way to Remove a Stuck Screen?
Soak it in warm soapy water for 10 to 15 minutes, then work a plastic pry tool gently around the edge instead of forcing it with metal, which risks cracking clips or housing.
How Often Should I Clean My Grinder Screen?
Daily users should aim for a weekly clean, while occasional users can usually get away with once a month before buildup affects grind quality.
Does Mesh Size Affect How Often I Need to Clean?
Yes. Finer mesh captures more kief but clogs faster, so a 60 to 100 mesh screen typically needs more frequent attention than a coarser one.